
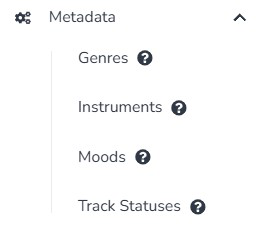
The Metadata section is where you manage the dropdown options that appear throughout the application when tagging your tracks. Think of these as the vocabulary of your catalog. Adding options here makes them available when creating or editing tracks.
Genres #
Manage the list of genres available when tagging your tracks.

- Click Genres in the left-hand menu.
- Click Add to create a new genre option.
- Type the genre name and click Save.
- The new genre now appears in the Genre dropdown when creating or editing tracks.
Sub-Genres #
Sub-Genres is a newer addition to the online version of Composer Catalog. Sub-genres let you add more specific classification under each main genre.
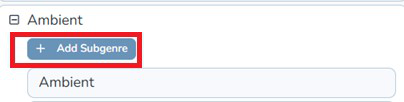
- Click Sub-Genres in the left-hand menu.
- Click Add to create a new sub-genre.
- Type the sub-genre name and click Save.
- The sub-genre is now available when tagging tracks.
| Tip: Use sub-genres to get more specific with your catalog organization. Instead of just “Electronic” you can have “Electronic > Breakbeat”, “Electronic > Ambient”, and “Electronic > House” — making your searches much more precise. |
Instruments #
Manage the list of instruments available when tagging your tracks.

- Click Instruments in the left-hand menu.
- Click Add to create a new instrument option.
- Type the instrument name and click Save.
- The instrument now appears in the Instruments field when creating or editing tracks.
Moods #
Manage the list of mood descriptors available when tagging your tracks. Mood tags are one of the most important metadata fields for sync licensing — music supervisors frequently search by mood.

- Click Moods in the left-hand menu.
- Click Add to create a new mood option.
- Type the mood name and click Save.
- The mood now appears in the Mood field when creating or editing tracks.
| Tip: Build a consistent and comprehensive mood vocabulary. Good mood options include: Uplifting, Melancholic, Tense, Playful, Triumphant, Mysterious, Hopeful, Aggressive, Peaceful, Romantic, Nostalgic, Cinematic, Energetic, and Dark. The more specific your moods, the better your search results. |
Track Statuses #
Track Statuses let you create custom labels to track where each song is in your workflow. You can create any status labels that make sense for how you work.

- Click Track Statuses in the left-hand menu.
- Click Add to create a new status.
- Type the status name. Example: Needs Mix, Ready to Pitch, Pitched – Awaiting Response, or Needs Help.
- Click Save
- The new status is now available when creating or editing tracks.
| Tip: Create a workflow-based set of statuses that match how you actually work. Examples: In Progress, Mix Pending, Ready to Pitch, Pitched, Under Review, Placed, and Needs Stems. Filtering by status gives you an instant picture of where everything stands in your workflow. |
| Tip: Set up your Metadata section before adding tracks. Having a complete vocabulary ready makes track entry faster and more consistent. |


